Surgical debridement Case 1 Debridement of chronic wound
Authors: Christian Kaare Paaskesen Stud. Med., and Hasan Gökcer Tekin MD.
Patient history
A 64-year-old female presented a chronic distal leg ulcer with pseudomonas aeruginosa infection. The wound etiology was unknown but venous insufficiency was suspected. The wound bed was covered with green debris and slough. Although, the patient received treatment with conservative wound dressing for months the wound did not show signs of healing. Surgical debridement with a split thickness skin grafts was planned to promote wound healing and break the slough/debris cycle.


Before and after
Procedure

Step 1: Preoperative wound bed – Medial view of lower leg
The wound bed is seen with a thick layer of fibrin and green debris. Underlying tendons are exposed on the anterior parts of crus.

Step 2: Lateral view of lower leg
The tendon from the peroneus longus muscle is visible
Step 3: Anterior view of lower leg
The wound bed stretches circumferential and covers almost half of the lower leg

Step 4: Posterior view of lower leg
Circumferential chronic wound

Step 5: Wound is cleaned before surgery
The wound is firmly cleaned before surgery – non-adherent slough is removed.

Step 6: Preoperative timeout
The surgical team is ready prior to surgery. Split skin graft from donor site on right femur
Video

Step 7: Transplant meshing
The split skin graft is placed on a plastic square, ready for meshing.
Video
Video
Video

Step 8: After debridement
After debridement, the wound bed is trimmed and prepared as a recipient site for the split skin grafts.
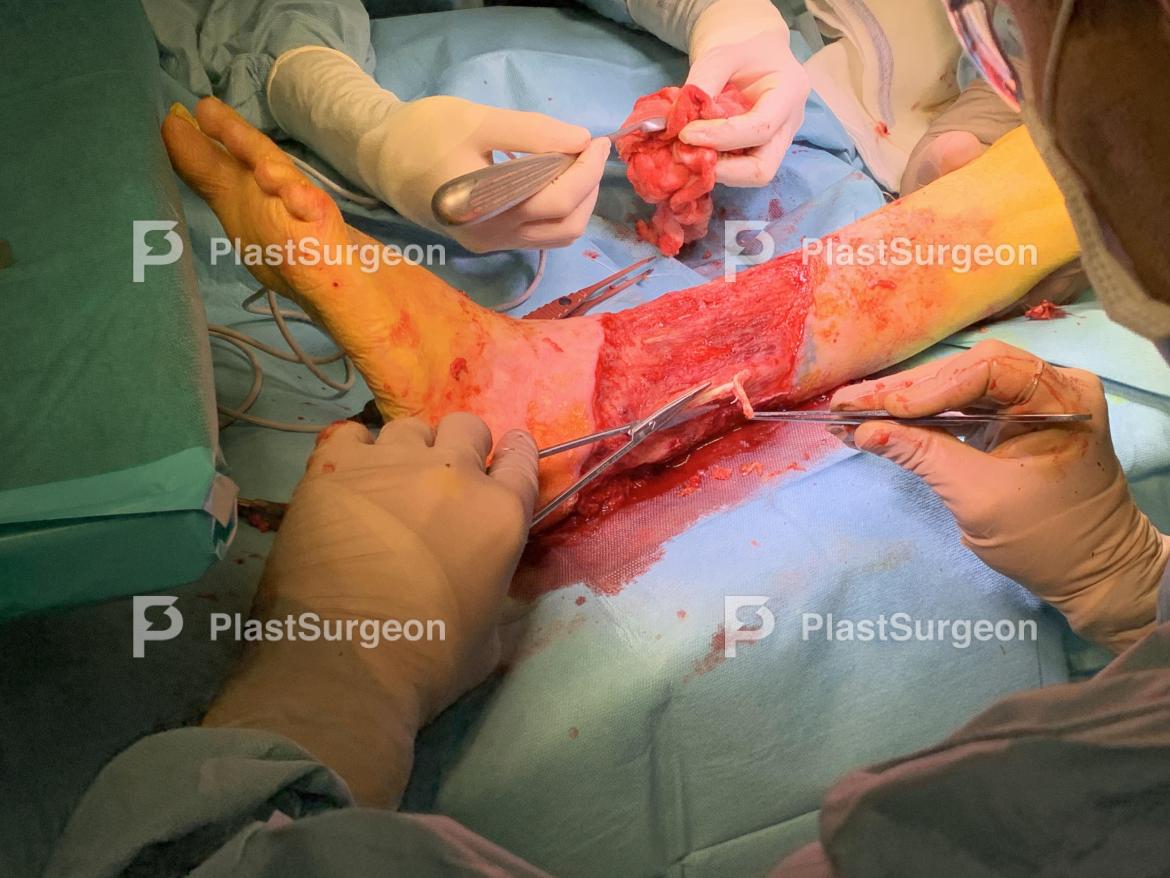
Step 9: Trimming
Avital tendons are trimmed to remove necrotic tissue and bacterial colonization

Step 10: Hemostasis
Hemostasis is secured.
Video

Step 11: Skin grafts are placed
The first of three split-thickness skin grafts are placed.

Step 12: Graft adjustment
The graft is adjusted to the wound edges.

Step 13: Second graft is placed
The second graft is placed.
Video

Step 14: Nitrofurazone gauze
Nitrofurazone gauze before it is applied to the wound.

Step 15: Nitrofurazone gauze applied
Nitrofurazone gauze applied to the wound.

Step 16: Secondary foam layer is applied
A foam is used as a secondary layer.
Video

Step 17: End result
The wound is now fully protected with primary and secondary dressings.

Step 18: Split-thickness skin graft donor site
Split-thickness skin graft donor site.

Step 19: Donor site wound dressings
Donor site wound dressings: Primary dressing is a foam dressing with adhesive silicone borders. The wound was covered with epinephrine-soaked gauze to reduce bleeding before wound dressing was applied.

Step 20: Donor site wound dressing
Donor site wound dressing

Step 21: Postoperative result
Immediate postoperative result.
Follow-up after 5 days

Step 1: Anterior view
Anterior view: After removal of the bolus dressing the split skin graft is fragile and not fully adherent. It will be let open to air dry for one hour per day. Notice lack of “take” over tendons due to lack of vascularization.

Step 2: Lateral view
Lateral view: Lack of “take” due to folding and overlap of the split skin grafts

Step 3: Medial view
Medial view: Good take of the split skin graft mainly due to a clean wound bed with healthy granulation tissue.

Step 4: Posterior view
Posterior view: Lack of “take” where the split skin grafts overlap.


